A pair of feet wearing variegated purple socks with cables up the front and ribbing along the back are resting on a driftwood bench.


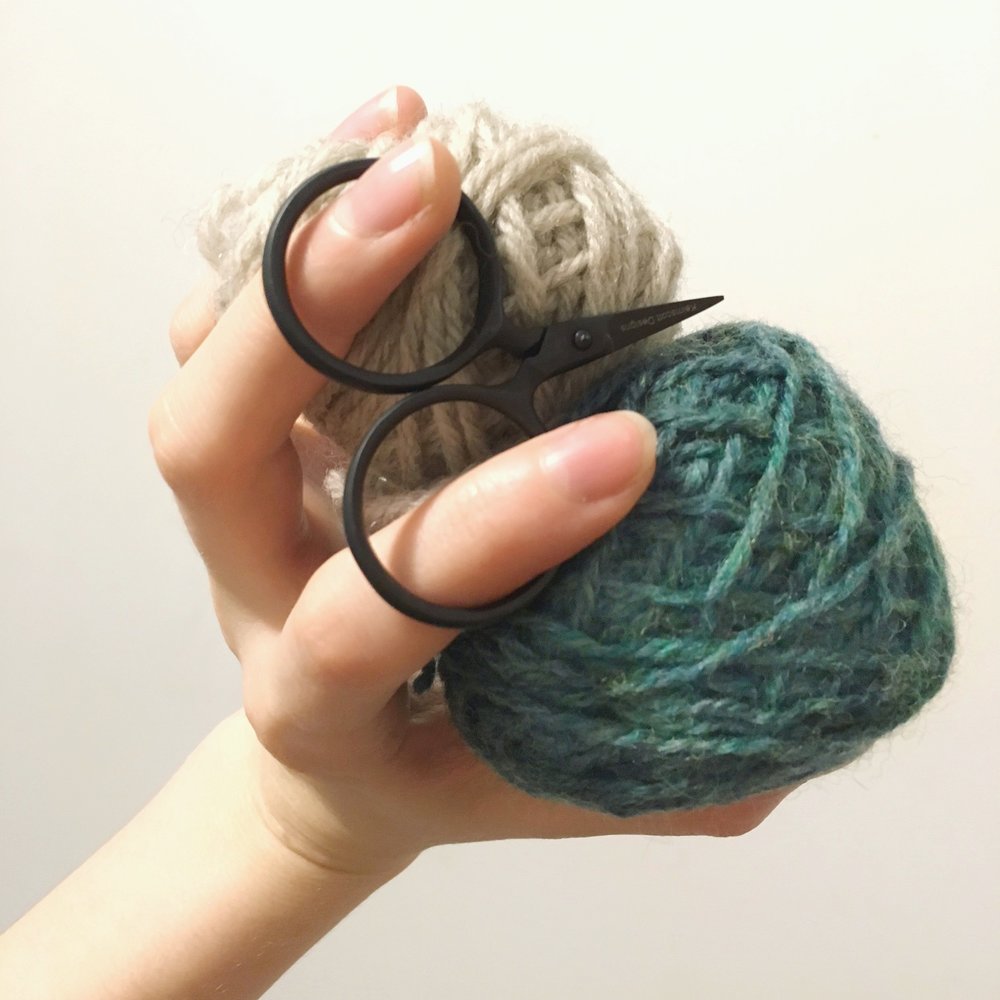
Have you ever bought yarn that was just dying to be something specific? This happens to me with sock yarn sometimes; I’ll pick up a particularly pretty skein in store without a project in mind and end up browsing Ravelry for ages looking for the perfect pattern to bring it to life, but none of them seem quite right. That’s exactly what happened with this Malabrigo Sock Yarn that I impulsively grabbed the last time I was at Argyle Yarns. The multifaceted colourway (Aniversario) was calling to me but I wasn’t quite sure which sock pattern off my current “to knit” list I was going to pair it with. Once I got it home and wound it into a cake it became clear that this yarn had a mind of its own and I was just along for the ride, so I cast on without a pattern and ended up putting together a pair of socks fit for a king!

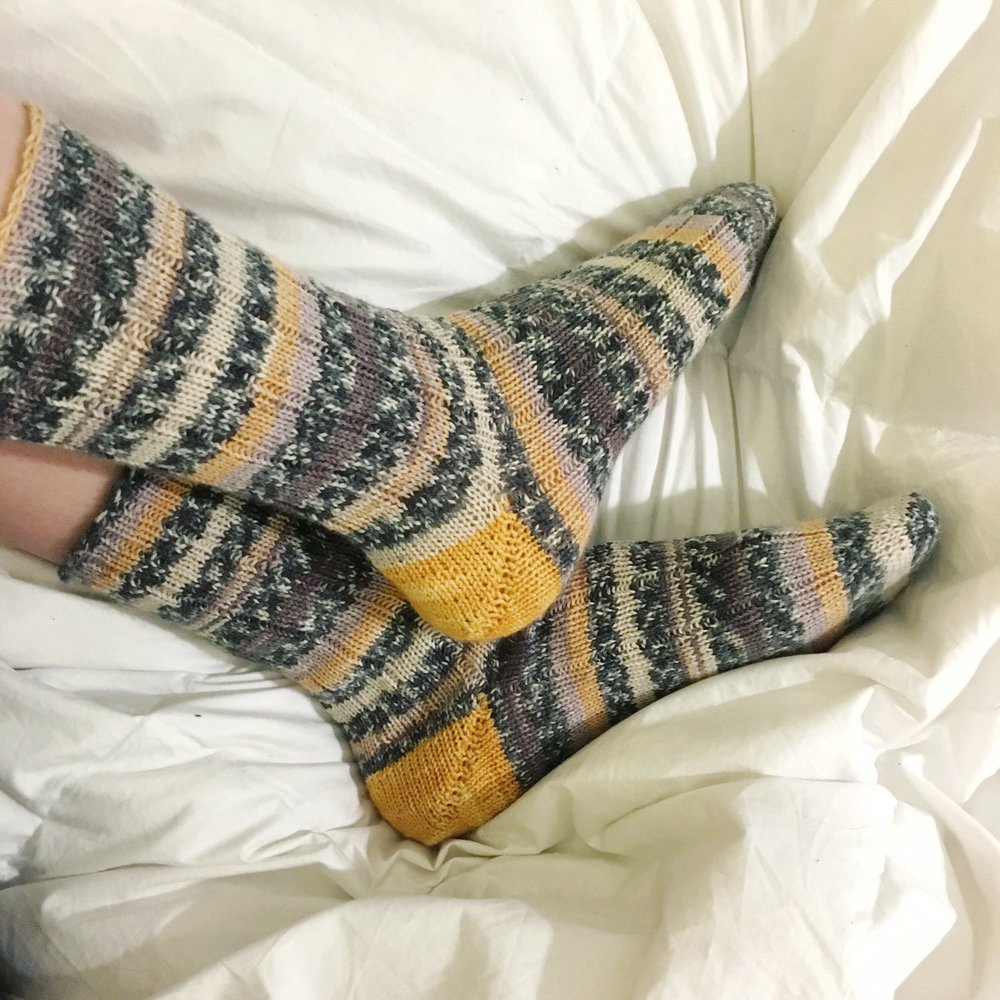
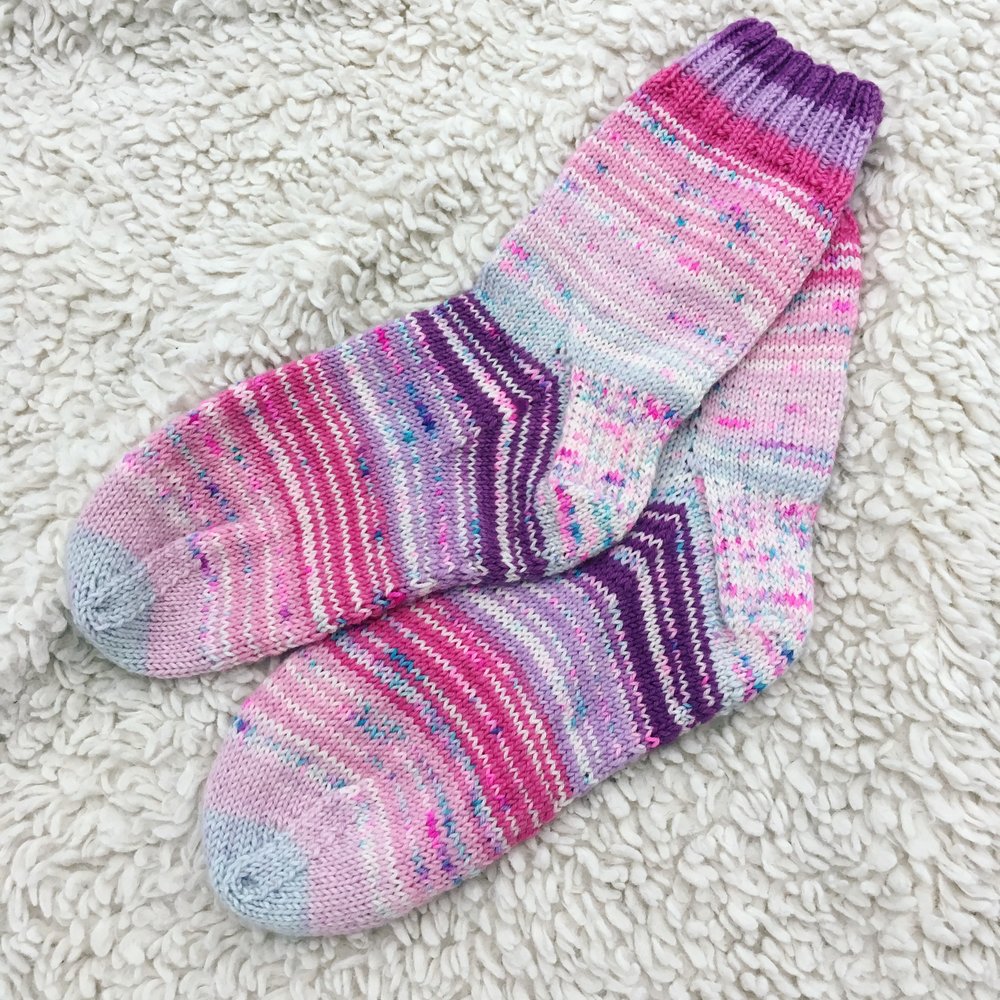
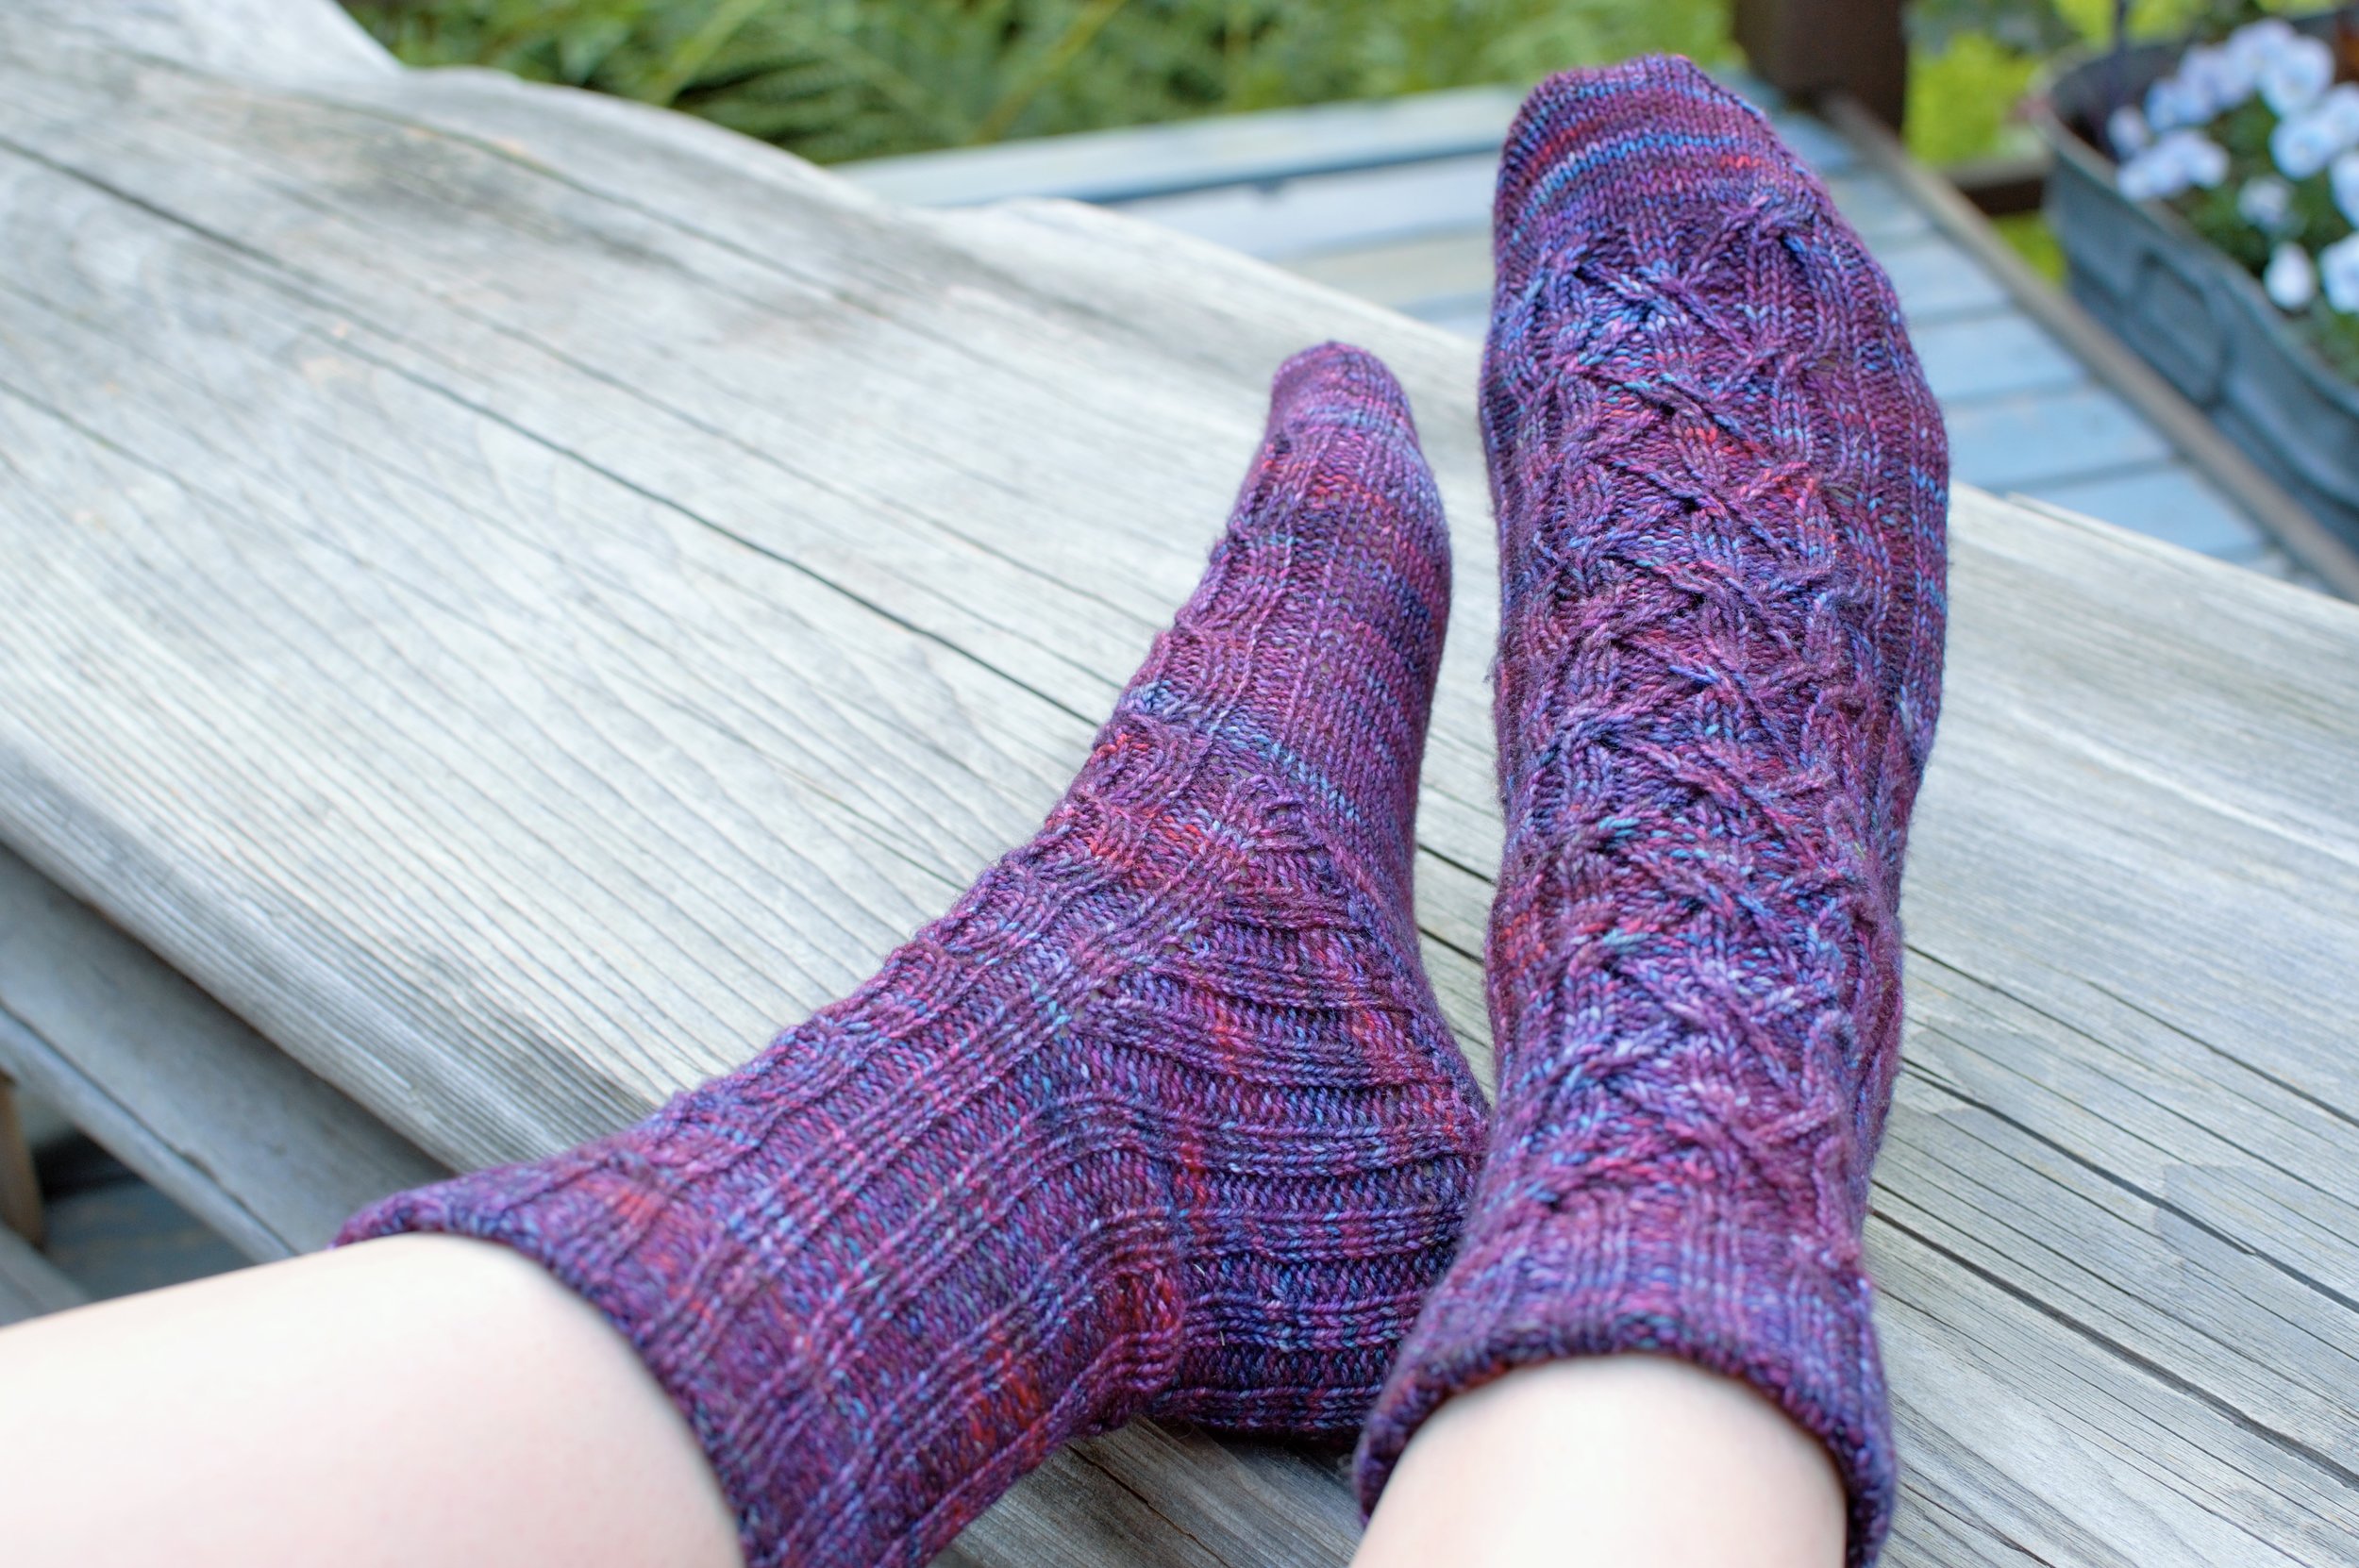
I named the Kings County Socks partly for their regal colour and partly because they’re inspired by Brooklyn’s unique mix of exaggerated aesthetics and no-nonsense attitude. They start off with a big, squishy fold over cuff which, let’s be honest, is unnecessarily luxurious. Usually cuffs are purely functional, but why not treat yo’self every once in a while? After joining the provisional cast-on, the cuff transitions smoothly into a 2×2 rib down the leg of the sock because there’s nothing better than a sock that hugs your foot. At that point the yarn was like, “hey, this is a good thing we’ve got going here… let’s just roll with it” so the socks incorporate a Strong-style heel (modelled afterthe one that Gerdine Crawford Strong designed for the Fall 2003 issue of Knitter’s Magazine) in order to maintain the ribbing right down to the heel turn.

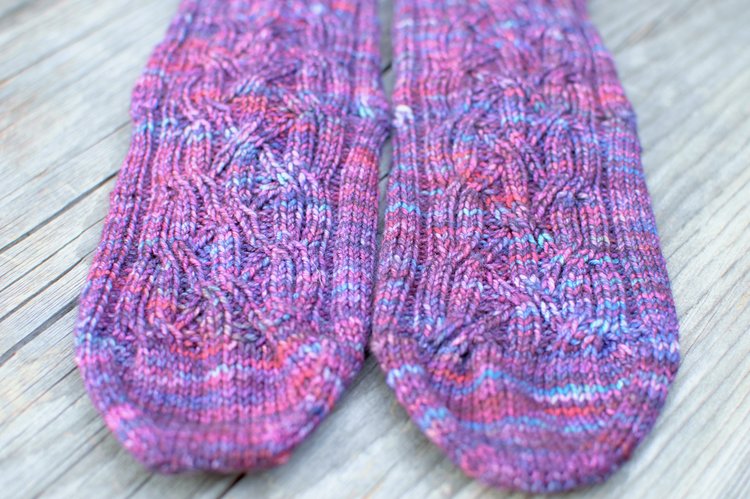
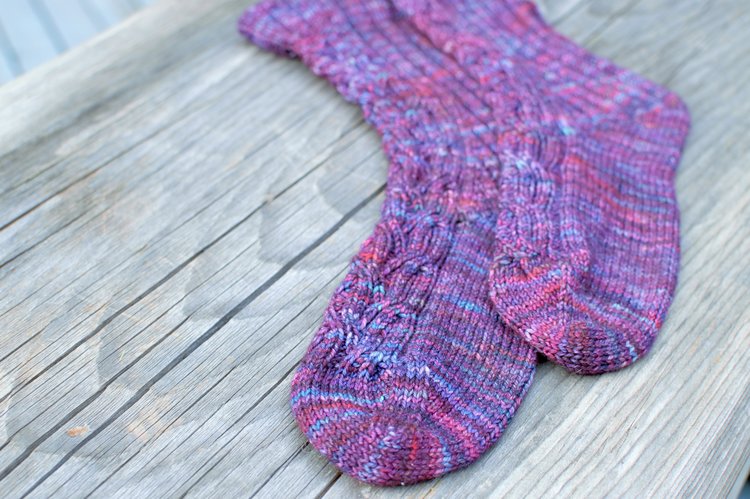
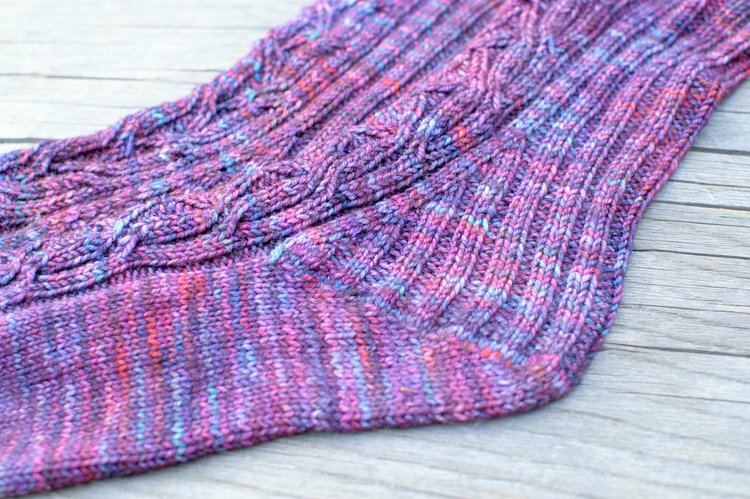
The beauty of this heel is that not only does it allow you to increase in pattern and thus gives you a heel that’s well fitted to the curves of your ankles, but it has no wrapping, no picking up stitches, and no measuring anything. All it is is a super simple mix of gusset increases followed by short row decreases. This utility is offset by the cable panel that runs down the front of the sock between the cuff and the toe, which is from Norah Gaughan’s lovely Knitted Cable Sourcebook. The book is an excellent resource for any knitter because not only does it contain examples of different stitch patterns but also goes into depth about the way Norah works with the different aspects of cables to develop unique textures and motifs. I love the way that these turned out and I’m ecstatic that I was able to put together a pair of socks deserving of this skein of yarn; I hope you enjoy knitting them as much as I did!

BUY THE PATTERN NOW

My King’s County Socks are written with an optional foldover cuff that calls for a provisional cast on. I’ve found when working provisional cast ons in the past that most instructions are written to start with either a crochet chain or a looped cast on where the provisional stitches are held on waste yarn until you’re ready to work them again. Here’s the thing though (which I figured out one day when I was grumbling to myself about how fiddly it is to transfer those provisional stitches from the waste yarn onto a needle without twisting them or dropping them or hoping that you don’t have to go back and re-knit the whole thing because you cast them on too tight) – if you have a spare circular needle lying around with a cable long enough to hold all your stitches you can cast on onto that and then work directly from the needle later, saving yourself the time spent grumbling and fiddling to pick up stitches from waste yarn when you’re ready to knit from your cast on again. As a bonus, it’s much easier to get into the rhythm of a looped cast on with two needles than it is with one needle and waste yarn; score one for lazy shortcuts. While I wouldn’t recommend holding all your provisional stitches on a circular needle for larger projects like the body of a sweater (unless you have a very long cable for said needle and are very confident that none of your stitches will slip off before you’re ready to work them again) it works perfectly for smaller magic-loop projects like hat brims or sock cuffs. The needle sizes and number of stitches listed below are specific to my King’s County Socks, but this method can be used for any number of stitches and any weight of yarn with the appropriately sized needles.

Beginning Provisional Cast-On:

For this cast on you’ll need two circular needles:

  • one size 2.5mm/US 1.5 (or whatever size you used to get gauge) which will be used to hold the live provisional stitches and
  • one size 2.25mm/US 1 (or one size smaller than you used to get gauge) which will be used to knit the cuff itself

Note: you can use DPNs in place of the smaller needle if you’d like to knit your cuff with those instead of using magic-loop. In that case, I would cast on all the stitches onto one single DPN (steps 1-5) and then rearrange them when you are ready to join in the round (as stated in step 6.) 

1. Leaving a two inch tail, tie a slip knot in your yarn and tighten it around your smaller (working) needle.

2. Use your right hand to hold this needle and the tail of the yarn with the larger (provisional) needle directly below.

3. Wrap the yarn in front of and under the lower needle…

4. Then in front of and over the upper needle.

5. Repeat 3&4 until you have 60[68] stitches on each needle; ending after a Step 3. Pull the lower (provisional) needle through so the stitches rest on the cable.

6. Rearrange your stitches & join to work in the round. The lower needle will hold your provisional stitches until you’re ready to join them.

Joining Provisional Cast On

Once you’ve worked 30 rounds of ribbing you need to join your provisional cast on to create the fold over cuff.

1. Fold the bottom of your cuff upwards so that you can position your provisional stitches inside of the round you just worked. Pull the stitches off of the cable and onto the needles, arranging them so that they match up with the stitches on your working needle.

2. Working in your established pattern of 2×2 rib, when you come to a knit stitch place your right needle knitwise through the front of the first stitch on the working needle and the first stitch on the provisional needle and knit them together, combining them into a single stitch.

3. When you come to a purl stitch place your right needle purlwise through the front of the first stitch on the provisional needle and the first stitch on the working needle and purl them together, combining them into a single stitch. You should end this round with 60[68] stitches total.

If you want the security of waste yarn keeping your stitches safe or you don’t think navigating around the bulk of an extra needle for a few rows is worth saving a step when picking your provisional stitches back up to work them again, I’d recommend Purl Soho’s One Step Provisional Cast On tutorial which uses a crochet chain method. What’s your favourite way to cast on provisionally? Do you have any other tips & tricks for lazy knitters like me?

A blonde woman sitting cross-legged in a grassy area of Washington Square Park, knitting a pair of pink socks.


Now that the first quarter of 2017 has come and gone (I’m sorry, it’s April already?! Are you sure?) it seems as good a time as any to check in with where we’re at in terms of the goals we set ourselves at the beginning of the year. I don’t usually make any formal new year’s resolutions, but I did have a few overarching knitting themes for the year; they say tracking your progress is important in goal setting and so is accountability, so I’m going to let y’all have a peek at my knitting bucket list. It’s ever-evolving and I keep doing that thing where I find fun new projects that I want to knit rather than actually working through the ones that have been in my queue for ages with yarn wound and ready to go, but there’s still 8 whole months left in 2017 right? I’ll get to them eventually.

Related to that mindset, one of my biggest goals is to make 2017 a year where I focus on destashing. I’ve got trunks full of yarn with projects in mind for most of it and because I’m the world’s slowest knitter I’m trying to focus on chipping away at those. They’re all patterns and garments that I’ve had my eye on for a long time (my next sweater project has been in my Ravelry queue since November 2015.) I know I want to knit these items, and I have the means to do so, but they keep being pushed to the back of the list by shiny new project ideas. So a big part of how I’ve been sticking to this goal is that I’ve put myself on a strict yarn diet. I know that if I get excited about a new project and buy soft new yarn to make it out of then the equally soft equally lovely yarn for an equally exciting project that I already own will get pushed to the back of the queue and forgotten about. That’s how I ended up with trunks worth of yarn for personal projects in the first place.

Literal trunks worth of yarn to destash

I’m very good at enjoying the process of knitting a garment. I try to remain present and aware of each step in the creation of whatever I’m making, which is good because if I was only interested in the finished product then I’d have quit a long time ago. But even with the whole idea of mindful focus and enjoyment of the present project, guess what? Not buying yarn is hard you guys! So I have a sneaky way around this: I’m only allowing myself to purchase yarn for specific business-related projects. Obviously custom orders and made to order items will require new yarn when I run out of my current stockpiles (aka this is a casual plea to order something please, so that I can engage in retail therapy) and as I branch into design work I’m allowing myself to purchase yarn in order to knit my sample garments. One day I’ll be a big deal and my favourite yarn companies will send me yarn support to develop patterns for them, but for now, I’m just plugging away slowly, making things that I dream up out of yarn that I can afford on a student’s budget.

This leads me to another one of my goals, which I’ve started to put a lot of energy into working towards in the past few weeks. I recently published the patterns to all three hats in my Autumn in the City collection (they’re free on the blog here, here, and here) and listed them on Ravelry. Writing them out and sharing these patterns was something that I put off for quite a while but I found that I really enjoyed the process. Because of this, earlier in the month I enrolled in the 10 day long Initiate Knit Design Challenge put on by Francoise of Aroha Knits on a whim. I’ve been knitting for a long time and I frequently modify patterns and figure out how to make things for myself all the time, but have always felt intimidated by formal pattern writing so I’m hoping that in what remains of the year I’ll be able to publish a few fully developed patterns that other people can knit for themselves and take inspiration from. I’m currently in the process knitting up my sample from the design I came up with during the challenge, which will be an asymmetrical triangle shawl done in fingering weight yarn held double to make use of a marled gradient. I’ll put out a call for test knitters once I’ve hammered out some of the details so if you’d like a chance to be one of the first ones to knit it, then subscribe to my mailing list or follow me on Instagram.

I also participated in a fun little knitalong on Instagram at the beginning of April run by Shannon Cook, Caitlyn Hunter, and Andrea Mowry where we practised steeking. Steeking was on my 2017 knitting bucket list, but I never really understood how it worked further than the fact that you basically cut your knitting in half. The #stEEKal was quick and easy, we knit up and then cut up some swatches, but it was a really good opportunity for me to do some research on the concepts behind steeking and when and why it would be useful. It makes sense to me now that the whole thing doesn’t fall apart even with minimal reinforcement because knitting unravels horizontally and a steek cuts through the work vertically (knitting theory is so cool you guys, I swear!) And it makes sense to me that a stranded colourwork project like a cardigan would be easier to work in the round where you don’t have to carry your ends back and forth across the work like you would if you worked it flat, hence the reason people do this crazy thing. That’s not to say that the idea of knitting up a full garment and then taking scissors to it doesn’t scare the pants off me still, but at least I have some practice under my belt before I decide to woman up and do the real thing on a real project. I’ve had my eyes set on a Brooklyn Tweed Redshift shawl for a while (but am going to have to buy new yarn for that, so the official steek project might have to wait until I’m finished with my destash goals.)

My last big knitting goal of the year is that I’m attempting to participate in the Box O Sox KAL challenge, and so far I’m (mostly) on pace for this. The idea is that if you knit a pair of socks every month, by the end of the year you’ll have a whole box worth of lovely handmade toe warmers to treasure for years to come. After being (needlessly) intimidated by how fiddly and complicated it seemed, I finally knit my first pair of socks shortly before Christmas 2015 and was immediately hooked. Because I’m an insane person, I then decided I was going to knit a pair for each member of my immediate family and banged out four pairs within a month. I’m taking on the Box O Sox challenge with a little bit less of a fevered pace; I’ve knit five pairs of socks this year, but one I started on Christmas Eve and one was for someone else so two of those technically don’t count. Still, catching up is definitely doable. Socks are the most common type of project for me to take on my commute because they’re so portable and easy to pick up or put down in the middle of a row if I need to change trains or am distracted by subway performers so I can definitely make up an additional one or two pairs if I fall behind. I love my small collection of hand knit socks that I’ve put together thus far and am excited to add to it. In most of my other personal knitting, I lean towards neutrals like greys and beige and black with the occasional jewel tone, but with socks I go wild. I want colour, I want patterns, I want texture, I want speckles and stripes and gradients and excitement (and then I want to hide them inside my black boots, tucked under my black pants, but that’s another story.) One thing that I especially like about them is that because they’re small projects, I can afford to buy and use quality yarn from local indie dyers. Eventually, I would like to have a whole drawer filled with brightly coloured socks with a wide variety of heel constructions and patterns and yarns, but this year I’ll start by working towards filling a box with twelve.

What about you? Did you set any knitting goals this year? Where are you at in terms of your knitting bucket list?

Three grey hats with an argyle knit texture and colourful pom-poms lie in the snow.


Bute is a textured latticework hat inspired by the peaks and valleys of Vancouver’s coastal mountain ranges. Sized to fit a woman’s head and worked with Cascade 220, it’s a quick knit that will keep you warm no matter which of our local hills you’re frolicking around on. 

Finished Dimensions:

17 finished circumference,  will comfortable stretch to fit a head up to 25″ in circumference

This should fit an average woman’s head. For a larger or smaller size, either increase or decrease your cast-on by a multiple of 16 or choose larger/smaller needles to modify your gauge.

Needles:

  • one 16″ circular needle in size needed to obtain gauge (suggested 4.5mm)
  • one 16″ circular needle one size smaller than first needle (suggested 3.5mm)
  • one set double pointed needles in size needed to obtain gauge

Additional Tools:

stitch marker

pom-pom maker

Gauge:

22 stitches per 4 inches in lattice pattern, after blocking

Materials:

  • 143 yards of worsted weight yarn (1 ball Cascade 220 shown here in Jet, Charcoal Grey, and Silver Grey)
  • optional 33 yards of contrasting worsted weight yarn for pom-pom (1 ball Cascade 220 shown here in Straw, Lavender Heather, and Nebula Heather)

Abbreviations:

K: knit

P: purl

C1F: slip one stitch to cable needle, hold in front of work, knit one, knit one from cable needle (left leaning cable)

C1B: slip one stitch to cable needle, hold behind work, knit one, knit one from cable needle (right leaning cable)

K2tog: knit two together (right leaning decrease)

SSK: slip slip knit (left leaning decrease)

P2tog: purl two together

Special Instructions:

To keep the lattice running continuously around the circumference of the hat, pay special attention to the transition between the last C1F on Row 6 of the pattern and the first C1B on row 7 especially if you are working solely from the chart; the second to last stitch of Row 6 will be a part of both of these cables and thus requires the following steps once you reach this point. Once you come to the last two stitches of Row 6:

  1. slip 1 stitch to cable needle and hold in front of work
  2. knit 1 (this was originally the last stitch of Row 6)
  3. remove beginning of round marker
  4. move cable needle to back of work
  5. knit first stitch of Row 7 (this now becomes the last stitch of Row 6)
  6. place marker
  7. knit one from cable needle (this now becomes the first stitch of Row 7)

When you reach the end of Row 7, the last stitch was already crossed over as part of this transition so you can knit the last 7 stitches before the marker and continue on with Row 8 as normal. These instructions are included within the written pattern in slightly less detail than above. If this seems convoluted, try to think of it as a braid.

Brim:

Using smaller needles, cast-on 96 stitches. Place marker and join to work in the round, being careful not to twist. Work 15 rows of modified rib.

Modified rib: *K2, P1, K2, P1, K1, P1 repeat from * to end of round

Body:

Switch to larger needles and work rows 1-12 three times:

Row 1: *K3, C1F, K3 repeat from * to end of round 

Row 2: *P2, C1B, C1F, P2 repeat from * to end of round

Row 3: *P2, K4, P2 repeat from * to end of round

Row 4: *P1, C1B, K2, C1F, P1 repeat from * to end of round

Row 5: *P1, K6, P1 repeat from * to end of round

Row 6: *C1B, K4, C1F repeat from * to 2 stitches before end of round. Place next stitch on cable needle and hold in front, K1, remove marker, move cable needle to back of work, K1, place marker

Row 7: K1 from cable needle, K6, *C1B, K6 repeat from * to 1 stitches before end of round, K1

Row 8: *C1F, P4, C1B repeat from * to end of round

Row 9: *K2, P4, K2 repeat from * to end of round

Row 10: *K1, C1F, P2, C1B, K1 repeat from * to end of round

Row 11: *K3, P2, K3 repeat from * to end of round

Row 12: *K2, C1F, C1B, K2 repeat from * to end of round

Work rows 1-6 one more time

Crown:

Continue working in the round, switching to DPNs once the decreases cause the circumference of the hat to become too small to continue on your circular needles.

Row 1: K1 from cable needle *SSK, K2, K2tog, C1B, K6, C1B repeat from * to 1 stitch before end of round ending after K6, K1 (12 stitches decreased, 84 stitches remain)

Row 2: *C1F, P2, C1B, C1F, P2tog twice, C1B repeat from * to end of round (12 stitches decreased, 72 stitches remain)

Row 3: *K2, P2tog, K4, P2tog, K2 repeat from * to end of round (12 stitches decreased, 60 stitches remain)

Row 4: *K1, K2tog, K4, SSK, K1 repeat from * to end of round (12 stitches decreased, 48 stitches remain)

Row 5: *K2tog repeat from * to end of round (24 stitches decreased, 24 stitches remain)

Row 6: *K2tog repeat from * to end of round (12 stitches decreased, 12 stitches remain)

Row 7: *K2tog repeat from * to end of round (6 stitches decreased, 6 stitches remain)

Cut working yarn and thread it through remaining stitches to bind off. Make sure to block your hat to help it have a soft drape, I would recommend shaping it around something round like a bowl to give it some shape. Then weave in ends and attach the optional pom-pom and you’re ready to go!

RAVELRY LINK

Three grey hats with alternating knit cables and colourful pom-poms lie in the snow.


Davie’s alternating cables are representative of the Vancouver shoreline and the various ebbs and flows that make up our day to day lives. Sized to fit a woman’s head and worked with Cascade 220, it’s a quick knit that will keep you warm during walks along the seawall and windy trips to the dog beach.

Finished Dimensions:

16″ finished circumference, will comfortable stretch to fit a head up to 25″ in circumference

This should fit an average woman’s head. For a larger or smaller size, either increase or decrease your cast-on by a multiple of 24 or choose larger/smaller needles to modify your gauge.

Needles:

  • one 16″ circular needle in size needed to obtain gauge (suggested 4.5mm)
  • one 16″ circular needle one size smaller than first needle (suggested 3.5mm)
  • one set double pointed needles in size needed to obtain gauge

Additional Tools:

stitch marker

pom-pom maker

Gauge:

24 stitches per 4 inches in cable pattern, after blocking

Materials:

  • 137 yards of worsted weight yarn (1 ball Cascade 220 shown here in Jet, Charcoal Grey, and Silver Grey)
  • optional 33 yards of contrasting worsted weight yarn for pom-pom (1 ball Cascade 220 shown here in Straw, Lavender Heather, and Nebula Heather)

Abbreviations:

K: knit

P: purl

C10F: slip 5 stitches onto cable needle and hold in front of work, knit 5 stitches from left needle, knit 5 stitches from cable needle (left leaning cable)

K2tog: knit two together (right leaning decrease)

SSK: one by one slip the next two stitches knitwise onto right needle, put them back onto left needle and k2tog (left leaning decrease)

P2tog: purl two together

P3tog: purl 3 together

Brim:

Using smaller needles, cast on 96 stitches. Place marker and join to work in the round, being careful not to twist. Work 15 rows of ribbing

Rib: *K2, P2 repeat from * to end of round

Body:

Switch to larger needles and work rows 1-18 two times:

Row 1-5: *K10, P2, K10, P2 repeat from * to end of round

Row 6: *K10, P2, C10F, P2 repeat from * to end of round

Row 7-11: *K10, P2, K10, P2 repeat from * to end of round

Row 12: *K10, P2, C10F, P2 repeat from * to end of round

Row 13-17: *K10, P2, K10, P2 repeat from * to end of round

Row 18: *C10F, P2, K10, P2 repeat from * to end of round

Crown:

Continue working in the round, switching to DPNs once the decreases cause the circumference of the hat to become too small to continue on your circular needles.

Row 1: *SSK, K6, K2tog, P2, K10, P2 repeat from * to end of round (8 stitches decreased, 88 stitches remain)

Row 2: *SSK, K4, K2tog, P2, K10, P2 repeat from * to end of round (8 stitches decreased, 80 stitches remain)

Row 3: *SSK: K2, K2tog, P2, K10, P2 repeat from * to end of round (8 stitches decreased, 72 stitches remain)

Row 4: *SSK, K2tog, P2tog, K10, P2tog repeat from * to end of round (12 stitches decreased, 60 stitches remain)

Row 5: *K2tog, P1, SSK, K6, K2tog, P1 repeat from * to end of round (12 stitches decreased, 48 stitches remain)

Row 6: *K1, P1, SSK, K4, K2tog, P1 repeat from * to end of round (8 stitches decreased, 40 stitches remain)

Row 7: *P3tog, SSK, K2, P2tog repeat from * to end of round (16 stitches decreased, 24 stitches remain)

Row 8: *K2tog repeat from * to end of round (12 stitches decreased, 12 stitches remain)

Cut working yarn and thread it through remaining stitches to bind off. Make sure to block your hat to help it have a soft drape, I would recommend shaping it around something round like a bowl to give it some shape. Then weave in ends and attach the optional pom-pom and you’re ready to go!

RAVELRY LINK

Three grey hats with a knit chevron texture and colourful pom-poms lie in the snow.

Thurlow’s ribbed chevron motif is inspired by the trees that line Vancouver’s streets and fill its surrounding forests. Sized to fit a woman’s head with a bit of slouch and worked with Cascade 220, it’s a quick knit that will keep you warm as this year’s long cold winter drags on.

Finished Dimensions:

17″ finished circumference, will comfortable stretch to fit a head up to 24″ in circumference

This should fit an average woman’s head with a bit of slouch. If you’d like a snug fit, I’d recommend adding a few extra rows of ribbing at the beginning and folding the brim up. For a larger or smaller size, either increase or decrease your cast-on by a multiple of 14 or choose larger/smaller needles to modify your gauge.

Needles:

  • one 16″ circular needle in size needed to obtain gauge (suggested 4.5mm)
  • one 16″ circular needle one size smaller than first needle (suggested 3.5mm)
  • one set double pointed needles in size needed to obtain gauge

Additional Tools:

stitch marker

pom-pom maker

Gauge:

22 stitches per 4 inches in chevron pattern, after blocking

Materials:

  • 145 yards of worsted weight yarn (1 ball Cascade 220 shown here in Jet, Charcoal Grey, and Silver Grey)
  • optional 33 yards of contrasting worsted weight yarn for pom-pom (1 ball Cascade 220 shown here in Straw, Lavender Heather, and Nebula Heather)

Abbreviations:

K: knit

P: purl

K2tog: knit two together (right leaning decrease)

SSK: slip slip knit (left leaning decrease)

P2tog: purl two together

Brim:

Using smaller needles, cast-on 98 stitches. Place marker and join to work in the round, being careful not to twist. Work 15 rows of ribbing (if you’d like a hat that fits more snugly I would recommend knitting an extra 3-5 rows of ribbing so you can fold the brim up.)

Rib: *K1, P1 repeat from * to end of round

Body:

Switch to larger needles and work rows 1-14 three times:

Row 1 & 2: *K1, P5, K2, P5, K1 repeat from * to end of round

Row 3 & 4: *K2, P4, K2, P4, K2 repeat from * to end of round

Row 5 & 6: *K3, P3, K2, P3, K3 repeat from * to end of round

Row 7 & 8: *K1, P1, K2, P2, K2, P2, K2, P1, K1 repeat from * to end of round

Row 9 & 10: *K1, P2, K2, P1, K2, P1, K2, P2, K1 repeat from * to end of round

Row 11 & 12: *K1, P3, K6, P3, K1 repeat from * to end of round

Row 13 & 14: *K1, P4, K4, P4, K1 repeat from * to end of round

Crown:

Continue working in the round, switching to DPNs once the decreases cause the circumference of the hat to become too small to continue on your circular needles.

Row 1: *K1, P2tog, P3, K2, P3, P2tog, K1 repeat from * to end of round (14 stitches decreased, 84 stitches remain)

Row 2: *K1, P4, K1 repeat from * to end of round

Row 3: *K1, P2tog, P2, K2, P2, P2Tog, K1 repeat from * to end of round (14 stitches decreased, 70 stitches remain)

Row 4: *K1, P3, K1 repeat from * to end of round

Row 5: *K1, P2tog, P1, K2, P1, P2tog, K1 repeat from * to end of round (14 stitches decreased, 56 stitches remain)

Row 6: *K1, P2, K1 repeat from * to end of round

Row 7: *SSK, K2tog repeat from * to end of round (28 stitches decreased, 28 stitches remain)

Row 8: K to end of round

Row 9: *K2tog, K1 repeat from * until two stitches remain, K2tog (10 stitches decreased, 18 stitches remain)

Row 10: K2tog to end of round (9 stitches decreased, 9 stitches remain)

Cut working yarn and thread it through remaining stitches to bind off. Make sure to block your hat to make the ribbing lie flat and reveal the chevron texture. Then weave in ends and attach the optional pom-pom and you’re ready to go!

RAVELRY LINK

A collection of grey knit hats with colourful pompoms that are arranged in a circle in the snow


I moved back to Vancouver in October after spending the summer doing resort work in the mountains. I grew up in this city, and I love it for numerous reasons, but Autumn can be a hard season for me here. After a few months away I grew used to the greenery of trees all around me and the blue of the sky reflected in the crystal clear lakes; moving away from all that during two of the most wet and most grey months on record took some getting used to. Vancouverites love to complain, and we especially love to complain about the weather, but I know that when I get caught in that downward spiral it just makes me miserable. Instead I tried to make a conscious effort this year to pay attention to the things that brightened the grey days. One thing I noticed was that the monotone nature of the city during these rainy months made the changing leaves on the trees and the sunshine slipping through the clouds stand out in contrast.

It was around October that I started thinking seriously about the idea behind Steady Hands Co as well. I think this collection, which I’m calling Autumn in the City, is representative of this attitude. 


Don’t get me wrong, the fall and winter months can be depressing, but I actually really like the colour grey. A large majority of my wardrobe is monochromatic and with the exception of socks I gravitate to all shades of grey when I pick out yarn for my own personal projects. I wanted this collection to be a love letter to all aspects of Autumn in Vancouver so I designed three different toques that were inspired by the city’s natural surroundings and I knit them up in three different shades of grey. They’re topped off with three contrasting choices of pom-poms as well, in order to bring a pop of colour to brighten even the darkest of days.

Three grey knit hats with an argyle cable pattern and colourful pom-poms lying in the snow

The first design is called Bute, and this hat features an interwoven trellis pattern that is reminiscent of the coastal mountain range that looms over Vancouver’s skyline. Winter’s first sighting of snow-capped peaks through a break in the clouds is one of my favourite days of the year; the proximity to the mountains is such an important and iconic part of Vancouver to me, so I knew I needed something to represent them when I was putting together this collection. I love the way Bute turned out, the texture is simple and classic while the modified ribbing adds a bit of playfulness. It’s sized to hug the average woman’s head with just a touch of slouch.

Three grey knit hats with ribbing that resembles a chevron pattern and colourful pom-poms are lying in the snow.

The second design is called Thurlow, and this hat’s ribbed chevron motif is inspired by the trees that line Vancouver’s streets and fill its surrounding forests. Our coastal rain forests are full of stories and history and I cannot imagine living somewhere that wasn’t surrounded by these green expanses. Being able to get lost between the trees even within the city limits is something that’s unique and wonderful. The simple repeating pattern is the slouchiest of the three designs and the result is a toque that fits the average woman’s head with a bit of room to scrunch down over your ears.

Three grey knit hats with alternating cable patterns and colourful pom-poms are lying in the snow.

The third and final design is called Davie; its alternating cables are representative of the Vancouver shoreline and the ebbs and flows that make up our day to day lives. Like many other Vancouverites, living in a coastal city is a defining feature of many of my days. I often take the SeaBus as a form of public transit, I grew up going for jogs along the banks of the Fraser River, and I have a tattoo of one of the bridges that leads into the heart of downtown. I chose two different cables for this toque to span from larger expanses like the Howe Sound and the Straight of Georgia to the small lakes and rivers that wind throughout the city. It’s designed to fit the average woman’s head with just a touch of slouch.

The patterns for these toques are available for free so that you can knit your own. You can choose a contrasting pom-pom or go without if you’re a purist. Here are some closer shots to show you how each style looks with each colour:

Three light grey hats with varying knit textures and colourful pom-poms are lying in the snow.

In “Pebble” which is a light grey colour, pictured from left to right: 

  • The Bute Hat with a Lilac pom-pom
  • The Davie Hat with a Merlot pom-pom
  • The Thurlow Hat with a Goldenrod pom-pom

Three charcoal grey hats with varying knit textures and colourful pom-poms are lying in the snow.

In “Charcoal” which is a medium grey colour, pictured from left to right:

  • The Davie Hat with a Lilac pom-pom
  • The Bute Hat with a Goldenrod pom-pom
  • The Thurlow Hat with a Merlot pom-pom

Three dark grey hats with varying knit textures and colourful pom-poms are lying in the snow.

In “Asphalt” which is a dark grey colour, pictured from left to right: 

  • The Davie Hat with a Goldenrod pom-pom
  • The Bute Hat with a Merlot pom-pom
  • The Thurlow Hat with a Lilac pom-pom

FIND PATTERNS NOW

This collection is a love letter to the city in which I grew up and currently live, so I think that it’s important to acknowledge that Vancouver sits on the unceded territory of the Musqueam, Squamish, and Tseil-Waututh peoples.

A red knit pullover with a cable that runs horizontally across the chest is laid flat against a floral bedspread and a fuzzy blanket.


It’s not something that I can claim a 100% success rate for, but every time I take on a new knitting project I try to learn something new. This started when I was first beginning to knit and I was overwhelmed by the endless amount of techniques and stitch combinations that make up the world of knitwear. I wanted to be able to make socks and pretty sweaters and lacy shawls and colourful mittens and all I knew how to do was knit, and purl (through the help of a thousand YouTube videos.) I didn’t know where to start but I knew I didn’t want to give up, so I decided that for my second project I would graduate from a stockinette stitch scarf and learn how to knit in the round. I made a hat! It was the most exciting thing in the world! And it wasn’t as hard as I thought it would be. So then I decided I would learn to cable. And then I picked a pattern with some lace work. And after that I decided I wanted to make mittens. So I did. By taking little baby steps and focusing on one thing at a time it didn’t seem so overwhelming and all of a sudden I had a whole bunch of new skills under my belt. Looking at all of the patterns on Ravelry no longer intimidated me.

A work in progress in red fingering weight yarn is being held in the knitter's hand on top of a floral bedspread and a fuzzy blanket.

It’s a concept I’ve stuck with, though on a more abstract level now that I’m comfortable with most of knitting’s basic skills and techniques. I try to be conscious about the way I’m putting things together and to follow my instincts when I think things need to be modified to fit my stupidly long torso or big feet. I’ve made an effort to knit quite a few sweaters this year and I’ve tried to choose ones with unique constructions (like the short rows in Judy Brien’s Engineered Seams or the boat neck and drop shoulders in Melanie Berg’s Threshold) so that I wasn’t just making the same top-down, seamless yoke pattern with different stitch combinations over and over again. The sweater I chose for November is a Brooklyn Tweed pattern written by Yoko Hatta: the Natsumi Pullover

It’s a fingering weight sweater, worked left-to-right from a provisional cast-on and I love the clean simple lines and the cable detail running across the chest and back. I picked out some Palette in Garnet Heather from Knit Picks’ last sale specifically for this pattern and I loved working with it. The stitch definition is great, it’s not scratchy at all, and I absolutely love the colour. The verdict is still out on how well it will hold up to wear in terms of fuzziness and pilling, but as of right now I’d definitely work with it again (especially at that price point!) Working on the sweater itself though has been an exercise in blind faith because I was literally knitting sideways. The provisional cast-on of over 200 stitches to make up the left side seam and armhole (which I somehow managed on the second try with only a minor amount of swearing I’ll have you know) was a hell of a way to start off, and a touch different from my usual long-tail cast-on to start a collar. I was diving in head first to “learning something new” in terms of how to knit a sweater.

A close up of a cable running horizontally across the chest of a red knit pullover.

That being said it was actually a relaxing knit; the stockinette was broken up by some shoulder seaming, the cable repeat, and some minor increases and decreases around the neckline but the construction gave me a couple of problems. I couldn’t really try it on as I went the same way I can with a top-down pullover, because the stitches on the live edge kept shifting around on the waste yarn and there wasn’t much to hold it up except for the join between the front and back on my left shoulder, but I haphazardly pinned it to my body a few times as I went along to have a loose measure of progress; I decided because it’s knit with a few inches of positive ease it wasn’t the biggest deal. That and I forgot to take into account the fact that I’m very comfortable with my stitch gauge, but not as much so with my row gauge, and because of the sideways construction the importance of the two is switched so I had to cut out a couple of pattern repeats along the neckline to make sure I didn’t end up with the world’s widest pullover.

Luckily after a bit of finishing (I love Brooklyn Tweed patterns, but they’re always rife with seaming and kitchener stitching things together and picking up and knitting the entire lower hemline to add ribbing) and a nice soak in some Eucalan, my little project blocked to a lovely loose pullover. The stitch gauge loosened up with blocking so it wasn’t as cropped as it looked while I was knitting it and the fabric relaxed so even though there was no waist shaping it hangs nicely and doesn’t look too blocky.

A close up of the ribbing at the bottom of a red knit pullover


As the years have passed I’ve learned to trust myself as a knitter. When I knit I’m brave in a way that I wish I could apply better to the rest of my life. I’m not as timid; the idea of trying new things and learning new things as I go rather than waiting until I’m absolutely sure I can take something on doesn’t scare me as much. Admitting failure isn’t as terrifying either. Though I’m never happy to rip back hours of work or frog a project, I’m not ashamed to acknowledge that something wasn’t working. I’d much rather start over or take two steps backward in order to come out with an end result that I’m proud of. I don’t always take on crazy projects. I love the texture and the drape of fabric and unique shapes, but I also have a strong affinity for clean lines and classic silhouettes. Sometimes I knit just for the sake of knitting. It’s important to find a balance, and I’m getting better at that every day. The Natsumi Pullover walked the line between simple and unfamiliar very well. I expect it will make its way into my regular winter sweater rotation with ease.

A red knit pullover is laid flat on a floral bedspread with a fuzzy blanket behind.